// //

New Blogger Widget: Contact form - Change Style & Install in a Static Page | Art2advice

Just a few days ago, Blogger introduced a new widget. It is about a contact form that you can add to your blog easily. It is very basic, because - at least for now, does not permit incorporating files or send anything other than plain text.

The contact form for Blogger has the following features:
  • Field for the user name
  • Field for email
  • Field for the message (textarea)
  • Submit Button
Screenshot
contact form, blogger gadgets, static page
 The design is simple and the text colors inherit the section where you add it. At the moment, this widget has no configuration options and is not available for dynamic views.

How to Add Contact Form to Blogger

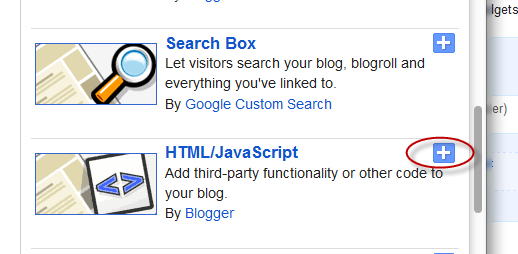
To add it to your blog, just select the Layout tab, then click on Add a gadget in the section you want to show, for example, in the sidebar. Then, select the More gadgets tab and add the Contact Form gadget.


blogger gadgets, blogger widgets, contact form

Styling Contact Form


As the background is transparent, the form will integrate well, aesthetically speaking, but nevertheless it is easy to modify using Style Sheets (CSS) to the appropriate selectors. Here's an example: 

 /* Contact Form Container */
.contact-form-widget {
width: 500px;
max-width: 100%;
margin: 0 auto;
padding: 10px;
background: #F8F8F8;
color: #000;
border: 1px solid #C1C1C1;
box-shadow: 0 1px 4px rgba(0, 0, 0, 0.25);
border-radius: 10px;
}

/* Fields and submit button */
.contact-form-name, .contact-form-email, .contact-form-email-message {
width: 100%;
max-width: 100%;
margin-bottom: 10px;
}

/* Submit button style */
.contact-form-button-submit {
border-color: #C1C1C1;
background: #E3E3E3;
color: #585858;
width: 20%;
max-width: 20%;
margin-bottom: 10px;
}

/* Submit button on mouseover */
.contact-form-button-submit:hover{
background: #4C8EF9;
color: #ffffff;
border: 1px solid #FAFAFA;
}

This is how it will look like after applying the style:
contact form, blogger gadgets, contact form for blogger

To add this style, go to Template > Edit HTML, click on the sideways arrow next to <b:skin>...</b:skin> and paste the code just above ]]></b:skin> (press CTRL + F to find it):


How To Add Contact Form In A Static Page


First step is to add the Contact Form gadget (Layout) and second, to edit the template (Template > Edit HTML) to remove most of the gadget. You have to search for the id "ContactForm", expand the widget by clicking on the black arrow on the left (same with the includable) and then delete the part that I have colored in red (see below):

Part to be removed:

   <b:widget id='ContactForm1' locked='false' title='Contact Form' type='ContactForm'>
    <b:includable id='main'>
  <b:if cond='data:title != &quot;&quot;'>
    <h2 class='title'><data:title/></h2>
  </b:if>
  <div class='contact-form-widget'>
    <div class='form'>
      <form name='contact-form'>
        <p/>
        <data:contactFormNameMsg/>
        <br/>
        <input class='contact-form-name' expr:id='data:widget.instanceId + &quot;_contact-form-name&quot;' name='name' size='30' type='text' value=''/>
        <p/>
        <data:contactFormEmailMsg/> <span style='font-weight: bolder;'>*</span>
        <br/>
        <input class='contact-form-email' expr:id='data:widget.instanceId + &quot;_contact-form-email&quot;' name='email' size='30' type='text' value=''/>
        <p/>
        <data:contactFormMessageMsg/> <span style='font-weight: bolder;'>*</span>
        <br/>
        <textarea class='contact-form-email-message' cols='25' expr:id='data:widget.instanceId + &quot;_contact-form-email-message&quot;' name='email-message' rows='5'/>
        <p/>
        <input class='contact-form-button contact-form-button-submit' expr:id='data:widget.instanceId + &quot;_contact-form-submit&quot;' expr:value='data:contactFormSendMsg' type='button'/>
        <p/>
        <div style='text-align: center; max-width: 222px; width: 100%'>
          <p class='contact-form-error-message' expr:id='data:widget.instanceId + &quot;_contact-form-error-message&quot;'/>
          <p class='contact-form-success-message' expr:id='data:widget.instanceId + &quot;_contact-form-success-message&quot;'/>
        </div>
      </form>
    </div>
  </div>
  <b:include name='quickedit'/>

</b:includable>
  </b:widget>

After you have saved the template, go to Pages and paste the following code into a new blank page with the title you want:

  <div class='widget ContactForm' id='ContactForm1'>
  <div class='contact-form-widget'>
    <div class='form'>
      <form name='contact-form'>
        <p>Name<p>
        <input class='contact-form-name' id='ContactForm1_contact-form-name' name='name' size='30' type='text' value=''/>
        <p>E-mail *</p>
        <input class='contact-form-email' id='ContactForm1_contact-form-email' name='email' size='30' type='text' value=''/>
        <p>Message *</p>
        <textarea class='contact-form-email-message' cols='25' id='ContactForm1_contact-form-email-message' name='email-message' rows='5'></textarea>
        <input class='contact-form-button contact-form-button-submit' id='ContactForm1_contact-form-submit' type='button' value='Submit'/>
        <p class='contact-form-error-message' id='ContactForm1_contact-form-error-message'></p>
        <p class='contact-form-success-message' id='ContactForm1_contact-form-success-message'></p>
      </form>
    </div>
  </div>
</div>

Messages will be sent to the same email that you have registered in Blogger.
Read More
// //

jQuery Sliding Panel with Expanding/Collapsing Content for Blogger | Art2advice

Many times when we think about making a blog, we want to put many gadgets, although many are not necessary, or perhaps only a few of them. But to add the gadgets that we want, we need to have enough space. A solution would be using an expanding/collapsing menu that is hidden and expands when the user clicks on it.

Originally, this plugin called Sliding Login Panel was created so that users could register on the site, but as we know, in Blogger we don't have the option to add a user registration, however, that doesn't mean that we can't take advantage of this plugin and use it to add other elements, such as a menu, search box, social icons, feed subscription etc.
You can find a demo of this panel in this blog - just click on the Open menu link on the top.

Adding the jQuery Expand/Collapse Slider Panel to Blogger

This sliding menu is made with jQuery, so the first thing is to add the script by pasting it just below the<head> tag:

Step 1. From your Blogger dashboard > go to Template > click on the Edit HTML button:

blogger template

Step 2. Click anywhere inside the code area and search by pressin the CTRL + F keys for the <head> tag

Step 3. Below the <head> tag, add this script:
 <script src='http://ajax.googleapis.com/ajax/libs/jquery/1.4.2/jquery.min.js' type='text/javascript'></script>
<script type='text/javascript'>
$(document).ready(function() {

$(&quot;#open&quot;).click(function(){
$(&quot;div#panel&quot;).slideDown(&quot;slow&quot;);
});

$(&quot;#close&quot;).click(function(){
$(&quot;div#panel&quot;).slideUp(&quot;slow&quot;);
});

$(&quot;#toggle a&quot;).click(function () {
$(&quot;#toggle a&quot;).toggle();
});

});</script>

<b:if cond='data:blog.pageType != &quot;item&quot;'>
<style>
body#layout #slide-top-panel {display:none !important;}
</style>
</b:if>

Step 4. Now search (CTRL + F) the </head> tag and add the CSS styles just above it:
 <style>
.clearfix:after {content: ".";display: block;height: 0;clear: both;visibility: hidden;}
.clearfix {display: inline-block;}
* html .clearfix {height: 1%;}
.clearfix {display: block;}
.clearfix {height: 1%;}
.clearfix {display: block;}

.tab {
background: url(https://blogger.googleusercontent.com/img/b/R29vZ2xl/AVvXsEjOULmH5ULZ2T5kP13OV33kGnYDR3xwYJCKU1VVh1VdTo6lp66du_VD8De5ETzK_SzsgT2gGeL90dfPkDrO_ucvTJccXfBCcmWd5noQ0cLvMrpo1v_cRaxCvZ6mOIzE72UWiBJEjU_kn15K/s1600/sliding-panel-tab-0.png) repeat-x 0 0;
height: 42px;
position: relative;
top: 0;
z-index: 999;
}
.tab ul.login {
display: block;
position: relative;
float: right;
clear: right;
height: 42px;
width: auto;
font-weight: bold;
line-height: 42px;
margin: 0;
right: 150px;
color: white;
font-size: 80%;
text-align: center;
}
.tab ul.login li.left {
background: url(https://blogger.googleusercontent.com/img/b/R29vZ2xl/AVvXsEiZQKtFSzXFroiU13DSYRg1Ekcui8UbEqXa8E6T9bY_XmmGSCATIRPX_p-aa741VdG8brdhGH8wCKDWhc361QXAQShbYy6bDyFoR99ot_FJw5R-efn_cXc1AdP7nMCb09ciC1ciOk-FZyou/s1600/sliding-panel-tab-left.png) no-repeat left 0;
height: 42px;
width: 30px;
padding: 0;
margin: 0;
display: block;
float: left;
}
.tab ul.login li.right {
background: url(https://blogger.googleusercontent.com/img/b/R29vZ2xl/AVvXsEhPyOFNS16DMu7dm9e87nXi2wEiD_NhNFPE7HJUNNCENi4fcfgSF32wsijH2__pT_6rMvN7IPy-AxFqSz8Uuu7Nj8NOw2C08sNdDJqTyuk-od47hhRQrS876aAMHW7I_NzcxEkiVn9i-KE8/s1600/sliding-panel-tab-right.png) no-repeat left 0;
height: 42px;
width: 30px;
padding: 0;
margin: 0;
display: block;
float: left;
}
.tab ul.login li {
text-align: left;
padding: 0 6px;
display: block;
float: left;
height: 42px;
background: url(https://blogger.googleusercontent.com/img/b/R29vZ2xl/AVvXsEjILwc9jr6rHjeP9zsdqdPEjvYJcuMHOX9zSx0wSttp0XjIcCaYTr__x9vZLv1_D9wUr0Lp9FaGrzKWbf3Jl_sJHN9FuOcIsyUxUWTypcWRGoN-iL__ajPMlC15MGOkbpZXWRFE_Fv647aw/s1600/sliding-panel-tab.png) repeat-x 0 0;
}

.tab ul.login li a {color: #15ADFF;}
.tab ul.login li a:hover {color: #FFFFFF;}
.tab .sep {color:#414141}

.tab a.open, .tab a.close {
height: 20px;
line-height: 20px !important;
padding-left: 30px !important;
cursor: pointer;
display: block;
width: 100px;
position: relative;
top: 11px;
}

.tab a.open {background: url(https://blogger.googleusercontent.com/img/b/R29vZ2xl/AVvXsEiQ729eBZe2sLGPRh-klQMkdy-Jlv9QcpNfUGEJOj795TAuXzj5PNfzq289_NlThZOelj9XJ6o9znp78KCc_j0eN7w7Y6nBeviY69WyDnq_ZGA_fEUBi3KKoNnEpFT5_kqbDpV-5CIpEohW/s1600/button-open.png) no-repeat left 0;}
.tab a.close {background: url(https://blogger.googleusercontent.com/img/b/R29vZ2xl/AVvXsEhD5SEzLBcTiNqQYMlHII9xxbJ8z2tCdLndCCXde2wxDuzJI-xBjUf3ZoynJmXOTZTHhBub_YBm1T8jjHKKYkcpKm9Dlgw60kZzAcjub6OKJeAHXopAOIelSoph00kWodlBHJU9Zdxt3xun/s1600/button-close.png) no-repeat left 0;}
.tab a:hover.open {background: url(https://blogger.googleusercontent.com/img/b/R29vZ2xl/AVvXsEiQ729eBZe2sLGPRh-klQMkdy-Jlv9QcpNfUGEJOj795TAuXzj5PNfzq289_NlThZOelj9XJ6o9znp78KCc_j0eN7w7Y6nBeviY69WyDnq_ZGA_fEUBi3KKoNnEpFT5_kqbDpV-5CIpEohW/s1600/button-open.png) no-repeat left -19px;}
.tab a:hover.close {background: url(https://blogger.googleusercontent.com/img/b/R29vZ2xl/AVvXsEhD5SEzLBcTiNqQYMlHII9xxbJ8z2tCdLndCCXde2wxDuzJI-xBjUf3ZoynJmXOTZTHhBub_YBm1T8jjHKKYkcpKm9Dlgw60kZzAcjub6OKJeAHXopAOIelSoph00kWodlBHJU9Zdxt3xun/s1600/button-close.png) no-repeat left -19px;}

#slide-top-panel {
position: absolute;
top: 0;
width: 100%;
z-index: 999;
text-align: center;
margin-left: auto;
margin-right: auto;
}
#panel {
width: 100%;
height: 230px; 
color: #999999;
background: #272727;
overflow: hidden;
position: relative;
z-index: 3;
display: none;
}
#panel h4 {
font-size: 18px;
color: #F2F2F2;
text-align: center;
padding: 5px 0 10px;
margin: 0;
}
#panel p {
margin: 5px 0;
padding: 0px;
}
#panel a {
text-decoration: none;
color: #15ADFF;
}
#panel a:hover {
color: white;
}
#panel .content {
width: 960px;
margin: 0 auto;
padding-top: 15px;
text-align: left;
font-size: 0.85em;
}
#panel .content .left {
width: 280px;
float: left;
padding: 0 15px;
border-left: 1px solid #333;
}
#panel .content .right {
border-right: 1px solid #333;
}
#panel .content form {
margin: 0 0 10px 0;
}
#panel .content label {
float: left;
padding-top: 8px;
clear: both;
width: 280px;
display: block;
}
#panel .content input.field {
border: 1px #1A1A1A solid;
background: #545454;
border-radius: 10px;
margin-right: 5px;
margin-top: 4px;
width: 200px;
color: white;
height: 18px;
}
#panel .content input:focus.field {
background: #7F7F7F;
}
#panel .content input.button-register {
display: block;
clear: both;
height: 24px;
width: 94px;
color: white;
background: transparent url(https://blogger.googleusercontent.com/img/b/R29vZ2xl/AVvXsEitiwtJfRvX8Sbgcep8_R0fokdwsfCTiUDgxGMhxiXsfellYXTheoTRXHMARgiEV-MzeGt2mgJZs31Y0_Rxx5NeMIIClwvdQ97uikhU5oSqmQ_n665J3ehCsLdHkC5X7ExRy_EOHwpPDKrc/s1600/button-register.png) no-repeat 0 0;
text-align: center;
cursor: pointer;
border: none;
font-weight: bold;
margin: 10px auto;
}
#sliding-panel {
width: 160px;
float: left;
}
#sliding-panel2 {
width: 160px;
float: right;
}
#sliding-panel ul, #sliding-panel2 ul{
font-family: Arial, Helvetica, sans-serif;
list-style-type:none;
margin:0;
padding:0;
}
#sliding-panel ul li a, #sliding-panel2 ul li a {
background:url(https://blogger.googleusercontent.com/img/b/R29vZ2xl/AVvXsEjYeoMThl8MaU2tpGej8mierofjpN6AOGwoS4ICVZXroLQwvzlcIfiWIQKWyRbaXAJKL7KYzAjK5VEGkVCOT3ojuLuvszZ1oDHFnnczNeSxu50QMtlLCB161p_vCroPfgrG5Fe6a2JJfNC4/s1600/star-bullet.png) center left no-repeat;
margin:0;
padding:3px 3px 3px 18px;
}
#sliding-panel li, #sliding-panel2 li {
display: inline;
}
#sliding-panel a, #sliding-panel2 a{
color: #999999;
text-decoration: none;
font-size: 11px;
display: block;
padding: 3px;
width: 160px;
}
#sliding-panel a:link, #sliding-panel a:visited, #sliding-panel2 a:link, #sliding-panel2 a:visited {
color: #999999;
text-decoration: none;
}
#sliding-panel a:hover, #sliding-panel2 a:hover {
color: #FFFFFF;
}

#search-box22{
margin-top: 20px;
}

#search-box22 input[type="text"] {
float: right;
background: 10px 6px #444;
border: 0 none;
font: bold 12px Arial,Helvetica,Sans-serif;
color: #777;
width: 160px;
padding: 6px 15px 6px 35px;
-webkit-border-radius: 20px;
-moz-border-radius: 20px;
border-radius: 20px;
text-shadow: 0 2px 2px rgba(0, 0, 0, 0.3);
-webkit-box-shadow: 0 1px 0 rgba(255, 255, 255, 0.1), 0 1px 3px rgba(0, 0, 0, 0.2) inset;
-moz-box-shadow: 0 1px 0 rgba(255, 255, 255, 0.1), 0 1px 3px rgba(0, 0, 0, 0.2) inset;
box-shadow: 0 1px 0 rgba(255, 255, 255, 0.1), 0 1px 3px rgba(0, 0, 0, 0.2) inset;
-webkit-transition: all 0.7s ease 0s;
-moz-transition: all 0.7s ease 0s;
-o-transition: all 0.7s ease 0s;
transition: all 0.7s ease 0s;
}

#search-box22 input[type="text"]:focus {
width: 190px;
}

.about-author {
width: 100%;
text-transform: none;
margin-top: 15px;
}
.authorbox {
overflow: hidden;
padding: 0;
width: 100%;
}
.authorbox .authorinfo {
}
.authorbox .authorinfo img {
float: left;
margin: 4px 10px 4px 5px;
border-radius: 100%;
width: 20%;
background: #222;
padding: 5px;
}
.authorbox .authorinfo p {
margin: 0;
padding: 0 5px;
text-align: left;
}
.authorinfo p a {
text-decoration:none;
}
.authorbox h3 {
margin: 0;
display: inline-block;
}
h3.boxtitle {
font-size: 14px;
}
</style>
Note:
- in case you need more space for your widgets, the height of the entire container can be changed by modifying the 230px value from height: 230px;
- To change the background color, change this color value: #272727

Step 5. And finally, we will place the HTML structure of it - right after the <body> tag, add this code:
 <!-- Start sliding panel -->
<div id='slide-top-panel'>
<div id='panel'>
<div class='content clearfix'>

<!-- first section -->
<div class='left' style='width:240px !important'>

<h4>Welcome to my blog!</h4>
<div class='about-author'>
<div class='authorbox'>
  <div class='authorinfo'>
<img src='https://blogger.googleusercontent.com/img/b/R29vZ2xl/AVvXsEgjOe6Nw3l5Yohk3ZKx6Z5x_y1ZnNNDpKJrrumAyYwBRyfuWpIMx32R4XlyEYlGVGG0FSOQpKQ6rzWgo_vl5OBEaY5vpq9bXGf-NEkfAZaHzjDz7RtxOkx6SkB8wGaracqwsJ7PAEvm0jhE/s1600/profile-pic.png'/>
<h3 class='boxtitle'>Meet the Author</h3>
<p>Ut eleifend tortor aliquet, fringilla nunc non, consectetur magna. Suspendisse potenti.</p>
</div>
</div>
</div>
<p align="right" style="margin-top: 10px;">Looking for something?</p>
<form method="get" action="/search" id="search-box22">
  <input name="q" type="text" size="40" placeholder="Search..." />
</form>

</div>

<!-- second section -->
<div class='left' style='width:320px !important'>
<h4>Categories</h4>

<div id='sliding-panel'>
<ul>
<li><a href='Link URL'>Category 1</a></li>
<li><a href='Link URL'>Category 2</a></li>
<li><a href='Link URL'>Category 3</a></li>
<li><a href='Link URL'>Category 4</a></li>
<li><a href='Link URL'>Category 5</a></li>
<li><a href='Link URL'>Category 6</a></li>
<li><a href='Link URL'>Category 7</a></li>
</ul>
</div>

<div id='sliding-panel2'>
<ul>
<li><a href='Link URL'>Category 1</a></li>
<li><a href='Link URL'>Category 2</a></li>
<li><a href='Link URL'>Category 3</a></li>
<li><a href='Link URL'>Category 4</a></li>
<li><a href='Link URL'>Category 5</a></li>
<li><a href='Link URL'>Category 6</a></li>
<li><a href='Link URL'>Category 7</a></li>
</ul>
</div>
</div>

<!-- third section -->
<div class='left right' align="center">

<h4>Subscribe to this blog!</h4>
<p style="padding:0px 30px;">Receive the latest posts by email. Just enter your email below if you want to subscribe!</p>

<form action='http://feedburner.google.com/fb/a/mailverify?uri=Feed-Name' method='post' target='_blank'>
<input class='field' name='email' type='text/' value=''/>
<input name='uri' type='hidden' value='Feed-Name'/>
<input name='lang' type='hidden' value='en_EN'/>
<input class='button-register' type='submit' value='Subscribe'/></form>

<div align='center' style="clear: both;">
<a href='http://www.facebook.com/username'><img title="Follow on Facebook" src='https://blogger.googleusercontent.com/img/b/R29vZ2xl/AVvXsEggBRnNsmy9FY4kVB7ijtpzzgu3Gh1U7garJpyrIh1tBwE-OAr-rmascfibbPFN7jhStpbCJxL3v-at81Lq5lqfErvKkZWzfIq1AO0k3tjoMrM4HDV0zeKtAoAklrgEUZU20ntMYLE3Du1D/s1600/Facebook.png' style='padding:5px;' width='32'/></a>
<a href='http://blog-address.blogspot.com/atom.xml'><img title="RSS Feed" src='https://blogger.googleusercontent.com/img/b/R29vZ2xl/AVvXsEjRcMQRtUx9TndRnRHiFhGYCKUSLXHQvsbapz_NaGwe9chUzFx6r2fQa79_VMkI1EKR3jp9vjgke9GK466cqY2mocM7BLnbKYolB4biNOB71c3PXDdb85nn4zICFXL8xNBWyE9oaABANJsb/s1600/RSS.png' style='padding:5px;' width='32'/></a>
<a href='https://plus.google.com/username'><img title="Follow on Google" src='https://blogger.googleusercontent.com/img/b/R29vZ2xl/AVvXsEhDuzABrOiIXo4u2qNCjiE-BWSFFKCUfQRz1BRUniyGx1nUXl0e33ksuJAqQAWMUlQ2M12jZFDlpLvgeaKOh3co9zwbpX7qWmnJjKcXhfeLpXqWT4KW5Tk3DrIuzOaeE4lGgSEVkC0hIRa9/s1600/Google-plus.png' style='padding:5px;' width='32'/></a>
<a href='http://twitter.com/username'><img title="Follow on Twitter" src='https://blogger.googleusercontent.com/img/b/R29vZ2xl/AVvXsEi-FN4aadtLuTUKPxoWZkc2sV_TdPu-6wicVdFQNhdCtDOoRmBGjTpwae5uoHT-sQStQqh2JqUuNplE4TEwlkg5WXyrA1rwgjm6Tuf8-PffdTzVxVEJp3318ob6nyNNFjVLgPl6kM2_oA3e/s1600/Twitter.png' style='padding:5px;' width='32'/></a>
</div>

</div>
</div>
</div>

<div class='tab'>
<ul class='login'>
<li class='left'/>
<li>Hello guest!</li>
<li class='sep'>|</li>
<li id='toggle'>
<a class='open' href='#' id='open'>Open menu</a>
<a class='close' href='#' id='close' style='display: none;'>Close menu</a>
</li>
<li class='right'/>
</ul>
</div>
</div>
Note: if you can't find the <body> tag, then try to find this one:
 <body expr:class='&quot;loading&quot; + data:blog.mobileClass'>
Here we have added the content in the sliding panel which will be hidden and will show on mouse click. In green are the names of each section so to make it easier to recognize them.

Note:
- In the first section, you can change the welcome message, "Meet the author" title and add your description by replacing the text in bold. To add your own picture, replace this URL:
 https://blogger.googleusercontent.com/img/b/R29vZ2xl/AVvXsEgjOe6Nw3l5Yohk3ZKx6Z5x_y1ZnNNDpKJrrumAyYwBRyfuWpIMx32R4XlyEYlGVGG0FSOQpKQ6rzWgo_vl5OBEaY5vpq9bXGf-NEkfAZaHzjDz7RtxOkx6SkB8wGaracqwsJ7PAEvm0jhE/s1600/profile-pic.png
- In the second section you have the categories - there add the URLs of your links by replacing the addresses in blue and replace Category 1, 2, 3... with the titles that you want to appear for the links.
- In the third section is the email subscription - you must have enabled this option in your Feedburner account - just replace the text in blue with the name of your blog's feed. As for the social icons below, change the URLs in blue with your Facebook and Twitte and add the URL of your blog's RSS feed address.

Basically, those are the main sections that can be customized, though, we can take some parts and paste something else instead.

Step 6. Save the template and that's it! Note that this menu works with jQuery, so if you are already using Scriptaculous, Prototype or Mootools, then it will not work.

Read More
// //

Simple Recent Posts Widget for Blogger/Blogspot | Art2advice

The main advantage on this Recent Posts widget is that it will show not only post titles but also post excerpts or snippets and it's easy to customize/ apply different style on it. To style it into your own design, you just have to modify the CSS style - you can change the link or background color, the size and color of text/links. 

What you can do with this widget:
  • display post titles only
  • change the number of posts
  • change the number of characters of the post snippet/excerpt
  • show the post dates

See the screenshot below:

How to add Recent Posts Widget to Blogger

Step 1. Log in to your Blogger Dashboard, then go to Layout and click on Add a Gadget link


Step 2. From the pop-up window, scroll down and choose HTML/JavaScript


Step 3. Select & Copy the code from one of the options below and paste it into the new HTML/JavaScript: 

Option 1: Recent posts widget with snippets

 <div id="hlrpsa">
<script src="http://helplogger.googlecode.com/svn/trunk/recent-posts-with-snippets.js">
</script>
<script>
var numposts = 5;var showpostdate = false;var showpostsummary = true;var numchars = 100;var standardstyling = true;
</script>
<script src="http://your-blog.blogspot.com/feeds/posts/default?orderby=published&amp;alt=json-in-script&amp;callback=showrecentposts">
</script></div>
<div id="rpdr" style="font-family: arial, sans-serif; font-size: 9px;">
<a href="http://helplogger.blogspot.com/2012/04/recent-posts-widget-for-bloggerblogspot.html" target="_blank" title="Grab this Recent Posts Widget">Recent Posts Widget</a> by <a href="http://helplogger.blogspot.com" title="Recent Posts Widget">Helplogger</a></div>
<noscript>Your browser does not support JavaScript!</noscript>
<style type="text/css">
#hlrpsa a {color: #0B3861; font-size: 13px;} #rpdr {background: url(https://blogger.googleusercontent.com/img/b/R29vZ2xl/AVvXsEihn-1t4zlM9szKwP7AnQupEgF9_NhkVv2Pj6q_pC9Y-mW880B1vGTnxGklMvpfi5h-vkMbjCrqZhAfCbqR9LvXGrNkwVGdXdIEbvRCvbMBS7ajhwZVu59eKv6094d4qfebR5uPKxFBQ7QL/s1600/blogger.png) 0px 0px no-repeat; padding: 1px 0px 0px 19px; height:14px; margin: 5px 0px 0px 0px;line-height:14px;}
#rpdr, #rpdr a {color:#808080;}
#hlrpsa { color: #999999; font-size: 11px; border-bottom:1px #cccccc dotted; margin-top:-10px; padding-bottom:10px;}
.hlrps a {font-weight:bold; }
.hlrpssumm {}
</style>

Option 2: Recent Posts Widget Showing Post Titles Only

 <div id="hlrpsb">
<script style="text/javascript" src="http://helplogger.googlecode.com/svn/trunk/recent-posts-with-titles-only.js"></script>
<script style="text/javascript">var numposts = 10;var showpostdate = false;var showpostsummary = false;var numchars = 100;var standardstyling = true;</script>
<script src="http://your-blog.blogspot.com/feeds/posts/default?orderby=published&alt=json-in-script&callback=showrecentposts"></script></div>
<div style="font-family: arial, sans-serif; font-size: 9px;" id="rpdr"><a href="http://helplogger.blogspot.com/2012/04/recent-posts-widget-for-bloggerblogspot.html" title="Grab this Recent Posts Widget" target="_blank">Recent Posts Widget</a> by <a href="http://helplogger.blogspot.com" title="Recent Posts Widget">Helplogger</a></div><noscript>Oops! Make sure JavaScript is enabled in your browser.</noscript>
<style type=text/css>
#hlrpsb a {color: #0B3861; font-size: 13px;} #rpdr {background: url( https://blogger.googleusercontent.com/img/b/R29vZ2xl/AVvXsEihn-1t4zlM9szKwP7AnQupEgF9_NhkVv2Pj6q_pC9Y-mW880B1vGTnxGklMvpfi5h-vkMbjCrqZhAfCbqR9LvXGrNkwVGdXdIEbvRCvbMBS7ajhwZVu59eKv6094d4qfebR5uPKxFBQ7QL/s1600/blogger.png ) 0px 0px no-repeat; padding: 1px 0px 0px 19px; height:14px; margin: 5px 0px 0px 0px;line-height:14px;}
#rpdr, #rpdr a {color:#808080;}
.bbrecpost2 {
padding-top:6px;
padding-bottom:6px;
border-bottom: 1px #cccccc dotted; }
</style>

Step 4.
  • Change 5 (option 1) and 10 (option 2) with the number of posts you want to display. 
  • Change false to true if you want the posts dates to appear 
  • Change 100 (option 1) if you want more characters to be displayed.
  • To change the color and font size of the links, modify the values in blue (links) and violet (font-size)
  • To change the style of posts summary, modify the values in green (color) and orange (font size)
  • Replace the your-blog text with the name of your blog or if you have a custom domain change all the bolded line with your address like in this example:
 http://www.your-site.com/feeds/posts/default....

Step 5. Save your widget. And that's it! Enjoy!
Read More