// //

Dropdown menu with search box for blogger | Art2advice

Dropdown menus are very helpful tool in site’s navigation. You can put lot of links in a single dropdwon list in these menus. This guide is about a stylish CSS based dropdown menu with inbuilt search box for blogger blogs. This menu is created in pure CSS and HTML only. There is no scripting language is used for creating this menu, that is why this menu do not reduces your blog’s loading speed. It is very easy to customize this dropdown menu according to your blog’s design. All these things are explained very well in this tutorial.

        Dropdown menu with search box for blogger

Adding dropdown menu to blogger 

~ Method 1 ~

Step 1: Login to your blogger dashboard.

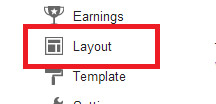
Step 2: Select your blog and Select Layout option.

Step 3: Select Add a gadget option below header

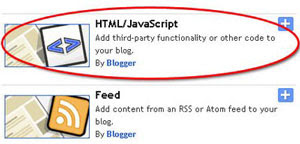
Step 4: Select HTML/JavaScript widget.

Step 5: In the HTML/JavaScript widget paste following code and save the widget.


~ Method 2 ~

Step 1: In your blog’s dashboard select Template option.

Step 2: Select Edit HTML option.

Step 3: In the template code find </header>

Step 4: Paste following code just below it and save template.


Code for Dropdown menu :


<style>
#navigation{
width:1000px;
height:40px;
display:block;
padding:0;
margin:0 0 22px 0;
margin-left:auto;
margin-right:auto;
background: #45484d; /* Old browsers */
/* IE9 SVG, needs conditional override of 'filter' to 'none' */
background: url(data:image/svg+xml;base64,PD94bWwgdmVyc2lvbj0iMS4wIiA/Pgo8c3ZnIHhtbG5zPSJodHRwOi8vd3d3LnczLm9yZy8yMDAwL3N2ZyIgd2lkdGg9IjEwMCUiIGhlaWdodD0iMTAwJSIgdmlld0JveD0iMCAwIDEgMSIgcHJlc2VydmVBc3BlY3RSYXRpbz0ibm9uZSI+CiAgPGxpbmVhckdyYWRpZW50IGlkPSJncmFkLXVjZ2ctZ2VuZXJhdGVkIiBncmFkaWVudFVuaXRzPSJ1c2VyU3BhY2VPblVzZSIgeDE9IjAlIiB5MT0iMCUiIHgyPSIwJSIgeTI9IjEwMCUiPgogICAgPHN0b3Agb2Zmc2V0PSIwJSIgc3RvcC1jb2xvcj0iIzQ1NDg0ZCIgc3RvcC1vcGFjaXR5PSIxIi8+CiAgICA8c3RvcCBvZmZzZXQ9IjEwMCUiIHN0b3AtY29sb3I9IiMwMDAwMDAiIHN0b3Atb3BhY2l0eT0iMSIvPgogIDwvbGluZWFyR3JhZGllbnQ+CiAgPHJlY3QgeD0iMCIgeT0iMCIgd2lkdGg9IjEiIGhlaWdodD0iMSIgZmlsbD0idXJsKCNncmFkLXVjZ2ctZ2VuZXJhdGVkKSIgLz4KPC9zdmc+);
background: -moz-linear-gradient(top, #45484d 0%, #000000 100%); /* FF3.6+ */
background: -webkit-gradient(linear, left top, left bottom, color-stop(0%,#45484d), color-stop(100%,#000000)); /* Chrome,Safari4+ */
background: -webkit-linear-gradient(top, #45484d 0%,#000000 100%); /* Chrome10+,Safari5.1+ */
background: -o-linear-gradient(top, #45484d 0%,#000000 100%); /* Opera 11.10+ */
background: -ms-linear-gradient(top, #45484d 0%,#000000 100%); /* IE10+ */
background: linear-gradient(to bottom, #45484d 0%,#000000 100%); /* W3C */
filter: progid:DXImageTransform.Microsoft.gradient( startColorstr='#45484d', endColorstr='#000000',GradientType=0 ); /* IE6-8 */


}
#menu{
float:left;
width:740px;
height:40px;
display:block;
padding:0;
margin:0;
}
#menu ul{
float:left;
margin:0;
padding:0;
}
#menu li{
float:left;
list-style:none;
line-height:40px;
margin:0;
padding:0
}

#menu li a, #menu li a:link{
color:#fff;
display:block;
margin:0;
padding:0 10px;
text-decoration:none;
font-family:verdana,arial;
}
#menu li a:hover, #menu li a:active, #menu .current_page_item a  {
color:#fff;
padding:0 10px;
background:#00bd39;
border-radius:18px;
}
#menu li li a, #menu li li a:link, #menu li li a:visited{
background: #111111;

color: #fff;
width: 150px;
margin: 0;
padding: 0px 10px;
line-height:30px;
position: relative;
border-bottxom:1px solid #00bd39;
}
#menu li li a:hover, #menu li li a:active {
background:#00bd39;
border-radius:0px;
color: #fff;
}
#menu li ul{
z-index:9999;
position:absolute;
left:-999em;
height:auto;
width:170px;
margin:0px;
padding:0px
}
#menu li:hover ul, #menu li li:hover ul, #menu li li li:hover ul, #menu li.sfhover ul, #topmenu li li.sfhover ul, #topmenu li li li.sfhover ul{
left:auto
}
#menu li:hover, #menu li.sfhover{
position:static
}

/* === Search Form === */
#search {
float:right;
width:230px;
padding:0px 0px ;
margin:9px 10px 0px 0px;
.margin:8px 10px 0px 0px;
background:#fff;
}
#search form {
margin: 0;
padding: 0;
}
#search fieldset {
margin: 0;
padding: 0;
border: none;
}
#search p {
margin: 0;
font-size:12px;
}
#s {
width:180px;
margin:0;
padding:3px 5px;
height:18px;
color:#444;
background:#fff;
float:left;
border:none;
display:inline;
}
input#searchsubmit{
background:url('http://2.bp.blogspot.com/-hTiuEA1yMzQ/UTsummbkmMI/AAAAAAAABbs/CyyGd92XiVM/s1600/searchbu.png');
float:right;
display:inline;
margin:2px 5px 0px 0px;
height:21px;
width:22px;
color:#fff;
border:none;
text-indent:-9999px;
.font-size: 0;
.display:block;
.line-height: 0;
}


</style>

<div id='navigation'>
<div id='menu'>
<ul>
<li>
<a href='#'>
                Home
              </a>
</li>
<li>
<a href='#'>
                Dropdown »
              </a>
<ul>
<li>
<a href='#'>
                    Link1
                  </a>
</li>
<li>
<a href='#'>
                    Link2
                  </a>
</li>
<li>
<a href='#'>
                    Link3
                  </a>
</li>
<li>
<a href='#'>
                    Link4
                  </a>
</li>
<li>
<a href='#'>
                    Link5
                  </a>
</li>
<li>
<a href='#'>
                    Link6
                  </a>
</li>
<li>
<a href='#'>
                    Link7
                  </a>
</li>
<li>
<a href='#'>
                    Link8
                  </a>
</li>
</ul>
</li>
<li>
<a href='#'>
                Contact us
              </a>
</li>

</ul>
</div>
<div id='search'>
<form action='http://www.art2advice.in/search/' id='searchform' method='get'>
<input id='s' name='q' onblur='if (this.value == "") {this.value = "Search this site...";}' onfocus='if (this.value == "Search this site...") {this.value = ""}' type='text' value='Search this site...'/>
<input id='searchsubmit' type='submit' value='search'/>
</form>
</div>
</div>

<!--navigation menu with search ends-->


Note : Perform following modifications in the above code.

To change background color of main menu and dropdown list change green color code with your own choice of color code.   

To change hover color modify the value of red color code with your own choice of color.   

To modify search box change www.art2advice.in with your own website name.
Read More
// //

Top 10 Highest Paying Google Adsense Alternatives in 2013 | Art2advice

If you are running a blog/ website because of getting some money, as all of you know that Google Adsense is known by their CPC,PPC etc is very high than any other ad network in the world. Google Adsense is world wide used ad network, millions of website getting Adsense on daily basis, as all of you know that Google Adsense is Google market and highest paying marketing the word then Why would anyone want to use Google Adsense Alternatives when Adsense is the best?

                                  Top 10 Highest Paying Google Adsense Alternatives in 2013 Top 10 Highest Paying Google Adsense Alternatives in 2013

So answer is very simply and easy, there are many reasons why a blogger would want to use Google Adsense alternatives, few of them mention here :

Google Adsense Very Hard To Approve 
Very strict Policies 
Due To Little Mistake You Account Will Banned 
Very late Payment 
Low PPC Rate 


So here is mention some disadvantages of Google Adsense due to which blogger now turning other ad providing networks, so here is the list of top 10 best alternate of Google Adsense.

Here are Top 10 Best Google Adsense Alternatives :

1. BuySellAds

I think second largest ad network in the world after Adsense, they will not pay you like Google Adsense or PPC, they will pay you for Ad space sold, mean to say that you have no need to search best advertiser, they will give to advertiser, advertiser will buy space on your website, about payment they will pay you 75% of payment and 25% they will keep.

 2. Yahoo! Bing Network

There is no doubt that YBN is a very good contextual Adsense alternative but it’s also so hard to approve, they give you two payment options Paypal and Wire Transfer. The minimum payout threshold is $100 and it’s very simple to achieve if you have got an honest traffic. YBN CPC Range is 0.05$ – 1$.

3. Infolinks  

I am also using infolinks on my other two blogs, this is also best alternate of Google Adsense, for infolinks approval you need a textual website or blog, if you have 15-20 textual post then you will approved by infolinks, there is no need of any other things, Infolinks will pay you according to PPC, Infolinks CPC Range is 0.001$ – 0.30$ and payment method also very easy, if you have 100$ you can receive payment via. Western Union, Wire Transfer, you can receive by Payoneer pre-paid debit card.  

4. Chitika  

Chitika, Inc. is a search-targeted advertising company. Chitika is a PPC ads network, I personally used Chitika few years on my blogs, if you have good amount of traffic on your blog, and you can get really good CPC clicks. Approval on Chitika is very easy, need of specific page view or traffic, Chitika CPC Range is 0.01$ – 1$, you can receive payment via  PayPal when your balance crosses $10 or you can receive payments via check (minimum balance must be greater than $50).  

5. Tribal Fusion

Very good alternate of Google Adsense, Tribal fusion is one of the popular CPM Ad network but so difficult to get approve, there are some requirement such as more then 50,0000 page preview per month, you need top-level domain URL, A professional and attractive site design and few more, if you have good enough traffic then you can get account here, you can receive Tribal Fusion payment via. Paypal, CPM Rates of Tribal Fusion is $0.20 to $ 1.

6. Clicksor  

Clicksor is reliable alternate of Google Adsense but good enough, it offers banner, text and pop up ads. Clicksor is very easy to approve, there is no such requirements to get approve you can just sign up and you can get account here,  clicksor CPC Range is 0.01$ – 0.5$, $2+ per 1000 views of pop-ups (CPM), you can receive payment via. Payout if you have account balance more then 50$.

7. Media.net

Bing Network Contextual Ads program enables web publishers to easily and earn advertising revenue. Media.net is providing its user the best rates for ads as well as the best ads. You can receive payment via through Paypal if you cross 100$.

8. Bidvertiser  

I think one or two time I use this program but I was not really impressed by it but you can try it, approval of Bidvertiser is so easy but it has very low CPC, I think CPC Range is 0.01$ – 0.2$ which is very low cost, you can receive pay via Paypal if you cross balance limit 10$.

9. Kontera

Not too impressive ad network is but good enough, it is in-text ad service that only works well if you have US/Canada and other European traffic, it’s is a good alternate of Google Adsense but it’s not for world wide, it is very easy to approve, CPC Range of Kontera is 0.001$ – 0.4$, you can receive payment via Paypal if you have minimum balance $50.

10. Exit Junction 

Another alternate of Google Adsense is Exit junction, if you have good amount of traffic on your website then you can earn more effectively by this program, it work different ways, it will show relevant Ad as a pop up window to a visitors, so you can get easily account here, Exit Junction has a fairly good CTR, You can receive payment if you have minimum amount $50.
Read More
// //

How To Disable Right Click On Your Website Or Blog ? | Art2advice

                                            Disable Right Click for blog

If you own a blog or a website then you always want to prevent other malicious bloggers from copying the content from your blog. You might have written an article with great efforts and lots of research and other just copy/paste it on their blog. To prevent such users from copying content from your blog i will show you Javascript Trick to disable right click on your blog. So lets get started.


How To Disable Right Click On Your Blog ?

1. Go to your blogger Dashboard and then Click on Layout.

                                                 blogger widget

2. Now Click on Add Gadget and select Html/Javascript.

                                     blogger widget

3. Now paste code given below in the pop up window.

<!--Art2advice Code-->
<script language='JavaScript1.2'>
function disableselect(e){
return false
}
function reEnable(){
return true
}
document.onselectstart=new Function ("return false")
if (window.sidebar){
document.onmousedown=disableselect
document.onclick=reEnable
}
</script>
<!--Code End http://www.art2advice.in>

4. Save it and done. Now users will not be able to right click on your website.  
Read More
// //

Simple Trick To Convert A Webpage To PDF File | Art2advice

                                        webpage as pdf

In this post i will teach a simple trick or browser feature that let you convert any web page into PSD file format, which might help you to read your favourite articles offline. So lets get started.


How To Save Web Page To PDF File ?

1. Open the Google Chrome Browser on your PC or MAC

2. Then go to the web page that you want to convert as a PDF.

3. Now press Ctrl+P on Windows PC or Command+P if you are on a Mac to Open the the Print dialog on Chrome Browser.

4. Now Change the destination to “Save As PDF” and hit the save button.

5. The current web page will instantly be downloaded as a PDF document.
Read More
// //

How To View Facebook Private Profile Photo In Large Size ? | Art2advice

                                        facebook private pic

Sometime you want to see clear image of someone on facebook who might not be your friend but his/her privacy setting stop you from doing this. In this tutorial i will teach you to view facebook private  or locked profile picture in large size with very simple trick.

How To View Facebook Locked Profile Picture ?

1. Open the facebook profile of person whose profile picture is locked or is set to private.

2. Right click on the profile picture and click on Copy Image Url as shown in image below.

                               Facebook Private Profile Photo

3. Open that image in new tab by  right clicking and selecting Paste (CTRL + V)

4. Now change the value of image size highlighted below which might be s160x160 to s720x720 {If its not clear try (s320x320) }

 Facebook Private Profile Photo

5. The image will enlarge in size. This trick does not always work.
Read More
// //

Make Money With Yahoo Ads Network | Art2advice

                                          Yahoo Bing Contextual Ads

Previously, We discussed on how can we earn money online with Google Adsense and many of our readers asked to review Yahoo Bing Contextual Ads Network and I'm here for them to fulfill their request. Today, I'm going to introduce and review Yahoo Bing Contextual Ads Network which is the best alternative to Google Adsense. This network is especially for those who are tired of getting disabled again and again by Google Adsense. It is true thatGoogle Adsense is strict in their policies and we should not depend only on Google Adsense. There are also thousands of alternative networks which we can use and Yahoo Bing Ads is also one of them. I will strongly recommend to everyone to give a try to Yahoo Ads if you're unable to use Google Adsense. Well, So now it's time to discuss the main thing about this post. Let's get started.

Yahoo Bing Contextual Ads Network

Yahoo Bing Contextual Ads Network is a good network for advertising for both Publishers and Advertisers. Publishers can generate revenue with it while Advertisers will get their brand into the next level. We'll specially discuss this for Publishers as the title of the post shows that. This is one the most popular PPC [ Paid Per Click ] click which is being used by million of people around the world. If you've a good blog or website and want to monetize it then you should give a try to this network. Because, it has more great and unique features if we compare it with Google Adsense. So here I'm going to explain that how can we use it and get paid.

How To Use ? - Invite, Create Ad, Generate Revenue and Get Paid

If you want to get started with Yahoo Bing Contextual Ads Network then continue reading this because here I'll tell you that how to use it and get paid. First of all, You've to apply to that network. Before applying, you should check their policies and if your site is complying with their policies then surely apply it. It will take about a week to review your application and you will get the mail from them about the status of your account. Once, If you got approval then you're ready to use that. Now you've to create some ad units and after that you will get the ad code which you've to implement in your site or blog. I recommend to add ad code in header, sidebar and below the post title. Simply, now when someone will click on your ads then you will be getting paid. For the payment, they use to send payment every month to their publisher but to receive the payment your earning must cross the minimum threshold which is $100 USD Dollars. They support the most popular and easy payment methods which are PayPal and Bank Transfer.

Features Of Yahoo Bing Contextual Ads Network

They have some brilliant features which I'm going to share below. These features are really amazing which may not be available in other advertising networks. So let me tell you what I'm talking about.

1. Big Advertiser Pool : Yahoo Bing Contextual Ads Network is a big advertiser pool. It means you will get all kinds of advertisements according to your niche. No matter, on which niche your site is based, They will show the most appropriate and target keyword ads according to your niche on your site. As you can see the live demo that this blog is about Blogging and see the Yahoo ads they should be related to blogging and technology.
2. Get Targeted Ads : This network will show the targeted ads on your site or blog. Mean to say, If your content is about fashion, shopping, technology, cooking or whatever it is then this network will show the ads according to your content or niche. In other words, you will get the related ads on your site according to the niche of your blog or site. Which helps you to generate even more revenue.
3. Customized Ads or Ads on Auto Pilot : This is another great feature of Yahoo Bing Ads that you can customize the Ads according to your choice. They have special tools for every publisher to customize the Ads easily. If you don't have time then you can set your Ads on auto pilot. The autopilot will automatically customize your ads according to the color of your site or blog. I don't think this is any bad thing but it's great.
4. Greater Control : This network allows you to give you full control of your ads and account. I think this feature may not be available on other networks like Adsense. So, in this feature, you can control your ads easily. If you don't like any ad topic then you can block it in your site from your Yahoo Ads account. More options like Influence Targeting, Filter Advertisers and Block Ad Topics are also available in this network.
5. Mobile Ads : If you are about to use Yahoo Bing Ads then you will not lose the mobile ads. With Yahoo Bing Contextual Ads Network, You can also show the ads on your site if someone is visiting from any mobile device. Mobile is the next most popular generation which is being popular nowadays. So, in future, the total number of mobile internet users will increase and we should not miss mobile ads. And this network supports almost every mobile.
6. Track Performance In Real Time : One of the most pretty feature of this network is that it gives you the reporting and performance in real time. It also provides the real and accurate stats. No matter, if you are unable to track the performance from your laptop or computer, you can get the reporting also on mobiles like the iPhone or iPad.

Approval Tips

Now after seeing some awesome features you may be interested in using Yahoo BingContextual Ads Network. So, here I'm going to give you some tips to get your site or blog approved. I will not take your too much time so that I've just listed some things which your site/blog must have to get approved.
  1. TLD [ Top Level Domain Name ] - .Com, .Net, .Org etc. -
  2. Unique, Quality and Acceptable By The Network Content
  3. Domain Age = 3/4 Months
  4. 40% Organic Search Traffic
  5. 1000 Daily Pageviews
  6. About Us, Contact Us and Privacy Policy Pages
  7. Easy To Navigate

How To Apply For Yahoo Bing Contextual Ads Network?

So, when you're all done about the approval tips then it's time to request the invitation. It's not any difficult task you can do it just by following the simple steps below.
  • After filling the primary form, click the continue button to proceed to the next step.
  • After that, You will land in the next form which will be about the owner details. Means, it will ask for the details about the owner of a website. Simply, Fill it.
  • Finally, After filling the form click "I accept" button at the bottom.
  • Now a message will appear that you've successfully requested for the invite.
  • That's All!
Read More
// //

Upload and EARN - Free File Hosting Websites | Art2advice


Today we are gonna tell you about some of the file hosting website providers which can actually make you earn from your HOME. All you need is a PC OR Laptop ( They are actually a must :p )

Now you just have a look at the list provided :


1. Mightyupload


SPACE ALLOCATED :                        Unlimited
FEATURES :          Flash upload, Remote upload, Ftp upload & Torrent leech.
MINIMUM PAYOUT :                              $10
SIGN UP :                                               Required


2. Megafiles


SPACE ALLOCATED :                             Unlimited
FEATURES :                   Flash upload, Remote upload & Ftp upload.
MINIMUM PAYOUT :                                  $10
SIGN UP :                                                    Required


3. Crocko


SPACE ALLOCATED :                            Unlimited
FEATURES :         Flash upload, Remote upload, Ftp upload, API upload & Widget upload.
MINIMUM PAYOUT :                                 $10
SIGN UP :                                                   Required


4. Ziddu


SPACE ALLOCATED :                       Unlimited
FEATURES :                                  Flash upload ONLY
MINIMUM PAYOUT :                           $10
SIGN UP :                                             Required


5. TurboBit


SPACE ALLOCATED :                            Unlimited
FEATURES :                Flash upload, Remote upload, Ftp upload & Multi upload.
MINIMUM PAYOUT :                                $10
SIGN UP :                                                   Required


SPACE ALLOCATED :                                   Unlimited
FEATURES :                                 Flash upload, Remote upload & Remote UC.
MINIMUM PAYOUT :                                       $10
SIGN UP :                                                          Required


7. Uploading

                                   Uploading.com


SPACE ALLOCATED :                                       10 GB
FEATURES :                                                 Flash upload ONLY
MINIMUM PAYOUT :                                          $30
SIGN UP :                                                         NOT Required


8. Fileserve

                                 FileServe.com


SPACE ALLOCATED :                                    Unlimited
FEATURES :                                       File upload, Remote upload & Ftp upload.
MINIMUM PAYOUT :                                      $10-20
SIGN UP :                                                           Required


There are many other sites avaliable that we are unable to review due to shortage of time..

Here is a list :

     1. Wupload
     2. UploadStation
     3. Filecopter
     4. Uploadpay
     5. FileFactory
     6. Easy-Share
     7. Sharecash
     8. Depositfiles


Hope you would love our work and appreciate :) Happy surfing..!
Read More
// //

How to Lock your PRIVATE FOLDER | Art2advice


1. Make a folder on the desktop and name it as “folder”  

2. Now, open notepad and write ren folder folder.{21EC2020-3AEA-1069-A2DD-08002B30309D} and now (Notepad Menu) File>save as.  

3. In the ‘save as’ name it as lock.bat and click save ! (Save it on Desktop)  

4. Now, again open notepad again and write ren folder.{21EC2020-3AEA-1069-A2DD-08002B30309D} folder and now (Notepad Menu) File>save as.  

5. In the ‘save as’ name it as key.bat and click save ! (Save it on Desktop)  

6. Now, double click lock.bat to lock the folder and now if you open your folder, control panel will open up !  

7. Now, double click key.bat to open the folder and now if you open your folder, you can access your data inside the folder again !  

8. Lock your folder and hide the key.bat somewhere else on your hard disk !  

9. Whenever you want to open your folder just paste the key.bat on desktop and open your folder using it ! :)

Read More